Sunday, September 29, 2013

How to Add Barcode Scanning to your Web App using Xamarin

Recently I had a client who wanted to add barcode scanning capabilities to their web app. Their web app was already responsive thanks to Bootstrap but there isn't a convenient way to scan a bar code from mobile Safari or Chrome.

This turned out to be fairly trivial thanks to Xamarin and two components in their Component Store:
JsBridge - eases Native to Javascript communication
ZXing.Net.Mobile - handles the barcode scanning

Here are some screenshots of what the web app looks like when accessed via the iOS app:


One of the requirements of the bar code scanning was to not show the Scan button if the user is not using the native app. To do this I customize the UserAgent of the UIWebView and then do UserAgent sniffing on the server side to hide or show the Scan button.

You'll notice if you view the web app in a browser the Scan button is not displayed:
http://xamarinbarcodesample.apphb.com/
To enable this functionality in the iOS app we append a XamarinBarcodeSampleApp string to the default UserAgent of the UIWebView:

Then in the web app we do UserAgent sniffing for this string.

To wire up the Scan button we take advantage of JsBridge. The first thing we do is register the mt.js library. Secondly we listen for the scanComplete event which is triggered on the iOS app side. Thirdly we handle the Scan button click event and let the iOS side know about it by firing the scanBarcode event.

On the iOS side we need to enable JsBridge, then listen for the scanBarcode event. When scanBarcode is fired we display the ZXing.Net.Mobile scanner. If the user successfully scans a barcode we fire the scanComplete event and pass the barcode string as an event parameter.

The native / hybrid iOS app source code can be downloaded here: 
https://github.com/crdeutsch/Xamarin.iOS.BarcodeSample

The web app source code is here:
https://github.com/crdeutsch/Xamarin.Web.BarcodeSample

Final thoughts:

Xamarin tools are flexible enough to handle the requirements of the Web Application developer dipping their toes into native development. 

In fact the Xamarin tools work so nicely with UIWebView based web apps that I'd urge any developer looking at PhoneGap or Titanium to add Xamarin to your review list and avoid the limitations you may run into. 

For instance, I built a series of HTML5 based game for a client that play audio via Flash in a desktop browser. To make them work on an iPad I used Titanium to martial the audio playback to native code. At the time I figured Titanium was the best solution since the bulk of the code was already Javascript. I eventually ran into limitations with Titanium when I wanted to detect custom gestures and realized they don't have a 1 to 1 mapping with the iOS API like Xamarin does. I plan on porting this app to Xamarin in the near future to take advantage of more advanced native iOS functionality.

In a future blog post I will demonstrate how to use JsBridge and another library I wrote to martial audio calls to the native side like I did for those HTML5 games.

DISCLAIMER: I've been work full time for Xamarin for about 3 weeks as a web developer. The following experiences and opinions were developed during my 3 years as a freelance consultant.

Runaway Open Source Project - Lessons learned from developing HiSRC

TL;DR: Never reference files on servers you pay for in Open Source projects.

Today I noticed my monthly Amazon AWS bill was $20 more then normal.

Somehow 143GB of outbound transfer had happened in Sept. After an hour or two of investigation and deleting things out of buckets that may have caused it, I finally turned on logging and waited.

The logging revealed a plethora of requests for a file called 50K. I couldn't even remember what the file was there for. I thought maybe my account had been hacked. I finally Googled cdeutsch/50K and it immediately clicked.


Back in April of 2012 I helped developed the open source javascript library HiSRC. HiSRC checks for high resolution support and does a quick bandwidth test, if it detects either, high resolution images are served up dynamically on the client side.

Unfortunately I had placed the 50K test file in one of my Amazon S3 buckets and didn't change or remove that Url when making the library available publicly.

Fast forward to August 2013 and adoption of the HiSRC library has started to catch on by big names sites such as the following:
https://uber.com/
https://www.converse.com/
http://www.kia.com/us/en/vehicle/soul/2014/experience
http://www.tennis-warehouse.com/
http://balzac.montblanc.com/
http://www.rolandsands.com/mobile/bikes
https://www.bresicwhitney.com.au/

While it's flattering to have my nick cdeutsch appear in the source code of these sites, it's costing me money.

I've deleted the 50K file, but Amazon S3 will still charge me for the 403 errors that are now happening.

I'm waiting to hear back from Amazon on how to resolve this and am working on contacting the 3 biggest sites to get them to make the necessary changes.

Monday, June 17, 2013

What's The Best Structure for API Responses?

I learned something new while listening to Episode 12 of the Traffic and Weather podcast.

John Sheehan mentioned that when you return your XML or JSON from an API you should have an error envelop separate from the data envelop.

The main reason is if you're deserializing the output and mapping it to a class in a static language you can use error.message or error.code without namespace conflicts. This also gives you a consistent target for a given endpoint. John recommends avoiding returning one structure for success and another structure for error (something that I've been doing to date).

My take away is that John recommends structuring your return data like so:

Success:
{
  data: {
    id: 1,
    model: 'Mustang',
    make: 'Ford'
  },
  error: null
}

Error:
{
  error: {
    code: 3,
    message: 'Car not found'
  }
}

Continue reading to see the NOT RECOMMENDED way

The way I traditionally did it was without envelopes but the structure changes based on success vs error:

Success (the car object):
{
  id: 1,
  model: 'Mustang',
  make: 'Ford'
}
Error (the error object):
{
  code: 3,
  message: 'Car not found'
}

What I liked about my method is that you can deserialize directly to the class you want ("Car") without creating a wrapper class. For example, my way you don't have to have a class like this.

public class CarResponse 
{
  public Car Data { get; set; }
 
  public ApiError Error { get; set; }
}

The downside of my method is you have to do some extra work to parse errors into ApiError instead of Car.

I'm not 100% convinced I want to switch and have a bunch of response wrapper classes, but it's debatable whether there is another person more involved with APIs then John, so I'll probably be switching. ;)

Some questions I have for John's method (UPDATE: see comments for John's answers, my examples have been updated to reflect them).
  1. What's the recommendation for naming the envelop of the success data. Ex. "car" or always use something generic like "data"
  2. On success do you return the error envelop at all? If so, do you indicate a "no error" status code? Ex. "code: 0"

If you're working with APIs be sure to checkout John's excellent tool Runscope. It's good stuff.

Tuesday, November 27, 2012

Fixing 404 Errors for ASP.NET MVC Apps that Bundle Assets when Deployed to IIS

UPDATE 07/19/2013: As pointed out in the comments by Ray Moro, a better way to fix this may be to remove the extension from your bundle name. So /bundle/myscrips.js becomes /bundle/myscripts this will cause it to run the module without having to change the config settings below.

That's a mouthful of a title.

If you're using ScriptBundle and StyleBundle's in an ASP.NET MVC4 app and you're suddenly getting 404 errors even though EnableOptimizations is set to true make sure you have the following in your Web.Config in the system.webServer section:

<modules runAllManagedModulesForAllRequests="true">
  <remove name="BundleModule" />
  <add name="BundleModule" type="System.Web.Optimization.BundleModule" />
</modules>

I've wasted incalculable amounts of time on this issue, TWICE!!! I don't know why this isn't in the web.config by default or better yet not needed to use Bundling.

Sunday, October 14, 2012

Trip to San Francisco Guide

Here are my lessons learned after spending 9 days in San Francisco which is a follow up to my post Planning a trip to San Francisco where I solicited advice on what to do and where to eat.

Tips
  • Be prepared to do some walking, so bring comfortable shoes. Some days I walked up to 6 or 7 miles. There are also very steep hills/streets so keep that in mind before following the route your GPS gives you. The shortest distance may not be the easiest. For instance, it was brutal walking from the bay to Union Square via Mason St. Had I gone down a couple blocks I could have avoided the hill.
  • Biking across the Golden Gate Bridge over to Sausalito and taking a ferry back is a great idea. There are many places to rent bikes including Blazing Saddles.Walking to Sausalito is not such a great idea since there is a long stretch of walking on the side of road.
  • Sign up and try Uber. Much nicer service then a cab but typically more expensive.
  • Avoid walking through the Tenderloin, especially at night. Ask locals or your hotel concierge where that is if you can't figure it out.
  • Take advantage of the BART when you can. Great for getting from Union Square to the Mission or Pier 1. The best service I received while in San Francisco was from the vagrant lady who helped me buy my first BART ticket. She was a pro at working that thing. I should have given her a bigger tip considering the service I got elsewhere.
  • If you want to spend a whole day exploring the city do one of the open bus tours that allows you to hop-on and hop-off. The one I did had about 20 stops and another bus came about every 20 minutes, so for example you could hop-off and hang out at Haight Ashbury for a while and then continue on after you've spent some time there.
  • If you're going to visit Alcatraz and take the Cellhouse Audio Tour (recommended) allow for a good 3-4 hours minimum with travel time. Also, sign up in advance. I wanted to go on a Monday and it was sold out until Wednesday.
  • Be ware of the fog. If you're going to do something like take the open top bus tour or visit the Golden Gate, you want to do it on a clear day. The fog can come in and ruin the amazing scenery.
My Favorites
  • Zeitgeist - great beer selection reasonably priced. Great bloody marries too!
  • Mission Beach Cafe for weekend breakfast - Get a side of their bacon. I'm still thinking about it! There's usually a good hour wait to get in so be prepared for that. We put our name on the list and walked to Zeitgeist to get a bloody marry and timed it perfectly. 
  • Zero Zero - we had the Avocado Bruschetta, Geary pizza, Little Shells, and build your own desert sunday. It was all excellent. Some of the best food I had while I was there.
  • Fog Harbor Fish House - I ate lunch here and had an excellent view of Alcatraz and the Golden Gate. I also had dinner and it was a bit dark to take in the view but the food was still excellent both times.
  • Blue Bottle Coffee - excellent coffee
Disappointments
  • You can't get into a Giants game using a StubHub ticket/barcode that's on your phone. This is the city that arguably has more startups and innovation then the rest of the world combined AND charges $.10 for each grocery bag you use. I'm dumbfounded that I had to go to will call and have a paper ticket printed off.
  • Versus Minnesota, service (like at restaurants) is on average slower and less attentive, but relax you're on vacation. ;)


Sunday, September 23, 2012

Planning a Trip to San Francisco

UPDATE 10/14/2012: Here's a follow up on how the trip went.

I'll be taking my first trip to San Francisco, Sept 29 - Oct 8, 2012. I'm looking for recommendations for restaurants and attractions and some space to do some work/programming (coffee shop or coworking space).

Here is what I've crowd sourced from Twitter so far. Big thanks to johnsheehanjustinpeck, masteinhauser, mronge, Solome33, kaufenberg, matt_krieger, dberkholz, bassistance

Attractions / ToDo


Restaurants


Coffee Shops


Pubs


Transportation


Coworking


Sunday, September 16, 2012

Best Mug, Cups, and Water Bottle for Techies

Here are the four liquid receptacles that support my freelance web developer career. They're listed in order of usage.

(I need to build a special rack for these guys)

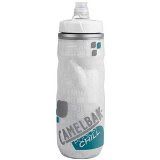
For water, I take my Camelbak Podium Chill Water Bottle everywhere. Home, co-working space, working out, trips. Tip of the hat to Donn Felker for doing the leg work on finding this excellent bottle. My only complaint is that it "talks" sometimes. If pressure builds up it will start making noise when it leaks out until you give it a little squeeze.


For coffee this Nissan Leak-Proof Travel Mug has been my goto for about 8 years. I own 3 of them and have bought at least 3 more as gifts. When closed this thing seals like no other. As good for road trips as it is for working around your laptop.


If you don't like the bulky handle, this other Travel Mug from Thermos Nissan is a great alternative recommended by my wife.


For tea, I have my third Thermos Nissan pick, a Tumbler with Infuser. I'm just getting into tea so there are probably some other great options I haven't discovered yet, but I've been really happy with this unit so far.


This summer I got addicted to Starbucks' iced coffee with a shot of white moca. Instead of paying $4 each day I decided to try make my own. First I tracked down the white mocha Starbucks uses. Next, since I use a Keurig for speed and convenience, I went with these Iced Coffee K-Cups. To complete the experience, my wife found these 16oz re-usable Starbucks cups with re-usable straws. To make the drink, put a couple of pumps of white chocolate in first, then fill to pretty much the top with ice, set the Keurig to the 8 oz setting, and brew directly onto the ice. The Iced K-Cups are specially formulated to brew stronger then regular K-Cups, so when the ice melts it balances out. Stir it up to blend in the white chocolate. Then I usually add a few more ice cubes if there is space.