Sunday, September 16, 2012

Best Mug, Cups, and Water Bottle for Techies

Here are the four liquid receptacles that support my freelance web developer career. They're listed in order of usage.

(I need to build a special rack for these guys)

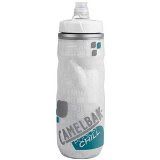
For water, I take my Camelbak Podium Chill Water Bottle everywhere. Home, co-working space, working out, trips. Tip of the hat to Donn Felker for doing the leg work on finding this excellent bottle. My only complaint is that it "talks" sometimes. If pressure builds up it will start making noise when it leaks out until you give it a little squeeze.


For coffee this Nissan Leak-Proof Travel Mug has been my goto for about 8 years. I own 3 of them and have bought at least 3 more as gifts. When closed this thing seals like no other. As good for road trips as it is for working around your laptop.


If you don't like the bulky handle, this other Travel Mug from Thermos Nissan is a great alternative recommended by my wife.


For tea, I have my third Thermos Nissan pick, a Tumbler with Infuser. I'm just getting into tea so there are probably some other great options I haven't discovered yet, but I've been really happy with this unit so far.


This summer I got addicted to Starbucks' iced coffee with a shot of white moca. Instead of paying $4 each day I decided to try make my own. First I tracked down the white mocha Starbucks uses. Next, since I use a Keurig for speed and convenience, I went with these Iced Coffee K-Cups. To complete the experience, my wife found these 16oz re-usable Starbucks cups with re-usable straws. To make the drink, put a couple of pumps of white chocolate in first, then fill to pretty much the top with ice, set the Keurig to the 8 oz setting, and brew directly onto the ice. The Iced K-Cups are specially formulated to brew stronger then regular K-Cups, so when the ice melts it balances out. Stir it up to blend in the white chocolate. Then I usually add a few more ice cubes if there is space.

Tuesday, August 28, 2012

Force Content Types to Json in .NET WebApi

I ran into a situation where I couldn't set the Content-Type header in the http request client I was using. (Crossrider's appAPI.request.post)

The client was either not setting a Content-Type or defaulting to application/x-www-form-urlencoded

If you put the code below in Application_Start you should be able to force form-urlencoded data to the JsonFormatter and by removing the XmlFormatter, Json will also be the default.

HttpConfiguration config = GlobalConfiguration.Configuration;
foreach (var mediaType in config.Formatters.FormUrlEncodedFormatter.SupportedMediaTypes)
{
    config.Formatters.JsonFormatter.SupportedMediaTypes.Add(mediaType);
}
config.Formatters.Remove(config.Formatters.FormUrlEncodedFormatter);
config.Formatters.Remove(config.Formatters.XmlFormatter);

Saturday, August 18, 2012

Using Less and Twitter Bootstrap in ASP.NET MVC4

UPDATE 05/02/2013:

Changed ScriptBundle and StyleBundle to just Bundle, per Andrey Taritsyn:
Bundle Transformer it is not recommended to use together with the StyleBundle and ScriptBundle classes, because these classes already contain transformations (instances of the built-in minifiers: CssMinify and JsMinify). Use a Bundle class.

UPDATE 11/08/2012:
  1. Create a new MVC4 Internet Application
  2. Add the following Nuget Packages
  3. Rename /Content/site.css to /Content/site.less 
    • Edit BundleConfig.cs in the App_Start folder and update the css file name to site.less like so:
      bundles.Add(new var cssTransformer = new CssTransformer();
      var jsTransformer = new JsTransformer();
      var nullOrderer = new NullOrderer();
      
      var defaultScriptsBundle = new Bundle("~/bundles/default.js").Include(
                  "~/Scripts/jquery-{version}.js",
                   "~/Scripts/jquery-ui-{version}.js",
                  "~/Scripts/site.js");
      defaultScriptsBundle.Transforms.Add(jsTransformer);
      defaultScriptsBundle.Orderer = nullOrderer;
      bundles.Add(defaultScriptsBundle);
      
      var defaultStylesBundle = new Bundle("~/Content/default.css").Include("~/Content/site.less");
      defaultStylesBundle.Transforms.Add(cssTransformer);
      defaultStylesBundle.Orderer = nullOrderer;
      bundles.Add(defaultStylesBundle);
      
    • Add the following to the top of /Content/site.less in order to have access to all of the Bootstrap mixins:
      @import "less/bootstrap.less"; 
      body {
            padding-top: 60px;
            padding-bottom: 40px;
      }
      @import "less/responsive.less"; 
      

    =================== THE REST OF THIS POST IS OUT OF DATE ==========

    UPDATE 8/20/2012: I've created a Nuget package that performs the steps below. I'd suggest reviewing what the package does below and then running:
    Install-Package Twitter.Bootstrap.Less.MVC4

    ASP.NET MVC4 has a great new feature that can bundle and minify your CSS and Javascript files.

    But in order to get Twitter Bootstrap to work it takes a bit more work. Here are the steps that worked for me.

    1. Create a new MVC4 Internet Application
    2. Add the following Nuget Packages
    3. Create an Infrastructure folder and add the following two files: (hat tip to this Stackoverflow question)
    4. Rename /Content/site.css to /Content/site.less 
    5. Edit BundleConfig.cs in the App_Start folder and replace the default Content/css bundle with the following:
      var css = new Bundle("~/Content/css").Include("~/Content/site.less");
      css.Transforms.Add(new LessMinify());
      bundles.Add(css);
      

    6. Add the following to the top of /Content/site.less in order to have access to all of the Bootstrap mixins:
      @import "less/bootstrap.less";
      

    If you have "shared" .less files from other projects I found importing them in site.less right after boostrap.less to work pretty well. They'll have access to all the mixins.
    @import "less/bootstrap.less";
    @import "less/shared.less";
    

    The completed solution is available on Github here

    If there is a better/easier way to do this please let me know in the comments!


    Friday, August 3, 2012

    Passing Cookies to a Node.js REST Client

    In Node.js if you want to pass the current user's Cookies to a REST call your making from the server here's a simple way to do it:

    var cookies = _.map(req.cookies, function(val, key) {
        return key + "=" + encodeURIComponent(val);
    }).join("; ");
    
    rest.get("http://makerocketgonow.com/", {
        headers: {
            Cookie: cookies,
            "Content-Type": "application/json"
        }
      }).on("complete", function(data) {
        return console.log(data);
    });
    

    This example uses the popular Restler library, but I assume you could do something similar with other libraries or without using a library.

    CAUTION: I'm using encodeURIComponent on the cookie value. Ruby on Rails seems to expect their cookies to be encoded like this. On the other hand, I've looked throw a few Node.js libraries that deal with cookies and they don't seem to manipulate the value at all. So you can play with adding or removing encodeURIComponent.

    If you start to get errors when making the REST request, be sure to check the cookie encoding/format versus what Firebug sends on a normal request to the site. Pay particular attention to any special characters.

    Monday, July 16, 2012

    Using Mongoid 3 (MongoHQ or MongoLab) on Heroku

    Here's what you need to get Mongoid working on Heroku, if you're getting errors like:
    NoMethodError (undefined method `[]' for nil:NilClass)

    Make sure the following is in your gem file (reference).
    source 'http://rubygems.org' 
    ruby '1.9.3'
    gem  'rails', '3.2.3'

    If you get an error like undefined method `ruby' run the following:
    gem install bundler --pre

    A lot of places have outdate documentation for configuring your mongoid.yml file which may result in the following error:
    No database provided for session configuration: :default

    Your mongoid.yml file should look like the following.
    production:
      sessions:
        default:
          uri: <%= ENV['MONGOHQ_URL'] %>
          options:
            skip_version_check: true
            safe: true
    The ENV variable above is for MongoHQ. For MongoLab use ENV['MONGOLAB_URI'] 


    Big thanks to the guys in this StackOverflow thread for helping me put all this together!


    Sunday, May 13, 2012

    Add support for LESS to Node.js connect-assetmanager package

    The connect-assetmanager Node.js package allows you to combine multiple javascript and CSS files into one and also do other manipulations like minification.

    It's part of Mathias Pettersson's (mape) excellent node-express-boilerplate template.

    If you're also using LESS for CSS here is some code you can add to get connect-assetmanager to process you're LESS files:

    var assetsSettings;
    assetsSettings = {
      js: {
        route: /\/static\/js\/[a-z0-9]+\/.*\.js/,
        path: "./public/javascripts/",
        dataType: "javascript",
        files: ["libs/underscore-min.js" "libs/jquery.mobile-1.1.0.min.js", siteConf.uri + "/nowjs/now.js", "site.js"],
        debug: siteConf.debug,
        stale: !siteConf.debug
      },
      css: {
        route: /\/static\/css\/[a-z0-9]+\/.*\.css/,
        path: "./public/stylesheets/",
        dataType: "css",
        files: ["libs/jquery.mobile-1.1.0.min.css", "style.less"],
        debug: siteConf.debug,
        stale: !siteConf.debug,
        preManipulate: {
          "^": [
            function(file, path, index, isLast, callback) {
              var match;
              match = path.match(/\.less$/);
              if ((match != null) && match.length > 0) {
                return less.render(file, function(e, css) {
                  return callback(css);
                });
              } else {
                return callback(file);
              }
            }
          ]
        }
      }
    };
    

    The import part is the preManipulate line under css but I include my entire assetsSettings from a project to make it easier to understand.

    Tuesday, May 1, 2012

    MonoTouch JsBridge - Communicate with the UIWebView

    Today I'm open sourcing JsBridge for MonoTouch which allows for bidirectional communication between the javascript in your UIWebViews and your native C# code in your MonoTouch app. Go directly to GitHub for the documentation on how to use it.

    This project was inspired by doing a project using Appcelerator's Titanium. In fact the javascript used in JsBridge was taken directly from that project, so if you're used to using Titanium you should be right at home using JsBridge.

    At this time it requires MonoTouch 5.3.3, which as of 5/1/2012 is in Alpha, because JsBridge needs to register a custom url protocol using NSUrlProtocol.

    I'm not 100% satisfied with the implementation of the event listeners on the native side, so I'm open to suggestions on how to make it better. Ideally some day the Xamarin team will implement something like this in a future version. ;)

    I've already submitted my first app to use it the iOS AppStore and it relies heavily on bidirectional communication between javascript and native. The app is a remote control for Rdio's new UI. A nicely executed feature by Rdio (even if it came way after the chrome extension remote I made for their first UI ;) ), but unfortunately it doesn't work on iOS partially due to the Rdio servers not supporting the Websockets protocol that the UIWebView has. Using JsBridge I was able to implement the WebSocket connection on the native side and override the Rdio javascript calls that use WebSockets and pass them to the native side and vice versa. I'm quite pleased with the results so far. ;)