Sunday, October 14, 2012

Trip to San Francisco Guide

Here are my lessons learned after spending 9 days in San Francisco which is a follow up to my post Planning a trip to San Francisco where I solicited advice on what to do and where to eat.

Tips
  • Be prepared to do some walking, so bring comfortable shoes. Some days I walked up to 6 or 7 miles. There are also very steep hills/streets so keep that in mind before following the route your GPS gives you. The shortest distance may not be the easiest. For instance, it was brutal walking from the bay to Union Square via Mason St. Had I gone down a couple blocks I could have avoided the hill.
  • Biking across the Golden Gate Bridge over to Sausalito and taking a ferry back is a great idea. There are many places to rent bikes including Blazing Saddles.Walking to Sausalito is not such a great idea since there is a long stretch of walking on the side of road.
  • Sign up and try Uber. Much nicer service then a cab but typically more expensive.
  • Avoid walking through the Tenderloin, especially at night. Ask locals or your hotel concierge where that is if you can't figure it out.
  • Take advantage of the BART when you can. Great for getting from Union Square to the Mission or Pier 1. The best service I received while in San Francisco was from the vagrant lady who helped me buy my first BART ticket. She was a pro at working that thing. I should have given her a bigger tip considering the service I got elsewhere.
  • If you want to spend a whole day exploring the city do one of the open bus tours that allows you to hop-on and hop-off. The one I did had about 20 stops and another bus came about every 20 minutes, so for example you could hop-off and hang out at Haight Ashbury for a while and then continue on after you've spent some time there.
  • If you're going to visit Alcatraz and take the Cellhouse Audio Tour (recommended) allow for a good 3-4 hours minimum with travel time. Also, sign up in advance. I wanted to go on a Monday and it was sold out until Wednesday.
  • Be ware of the fog. If you're going to do something like take the open top bus tour or visit the Golden Gate, you want to do it on a clear day. The fog can come in and ruin the amazing scenery.
My Favorites
  • Zeitgeist - great beer selection reasonably priced. Great bloody marries too!
  • Mission Beach Cafe for weekend breakfast - Get a side of their bacon. I'm still thinking about it! There's usually a good hour wait to get in so be prepared for that. We put our name on the list and walked to Zeitgeist to get a bloody marry and timed it perfectly. 
  • Zero Zero - we had the Avocado Bruschetta, Geary pizza, Little Shells, and build your own desert sunday. It was all excellent. Some of the best food I had while I was there.
  • Fog Harbor Fish House - I ate lunch here and had an excellent view of Alcatraz and the Golden Gate. I also had dinner and it was a bit dark to take in the view but the food was still excellent both times.
  • Blue Bottle Coffee - excellent coffee
Disappointments
  • You can't get into a Giants game using a StubHub ticket/barcode that's on your phone. This is the city that arguably has more startups and innovation then the rest of the world combined AND charges $.10 for each grocery bag you use. I'm dumbfounded that I had to go to will call and have a paper ticket printed off.
  • Versus Minnesota, service (like at restaurants) is on average slower and less attentive, but relax you're on vacation. ;)


Sunday, September 23, 2012

Planning a Trip to San Francisco

UPDATE 10/14/2012: Here's a follow up on how the trip went.

I'll be taking my first trip to San Francisco, Sept 29 - Oct 8, 2012. I'm looking for recommendations for restaurants and attractions and some space to do some work/programming (coffee shop or coworking space).

Here is what I've crowd sourced from Twitter so far. Big thanks to johnsheehanjustinpeck, masteinhauser, mronge, Solome33, kaufenberg, matt_krieger, dberkholz, bassistance

Attractions / ToDo


Restaurants


Coffee Shops


Pubs


Transportation


Coworking


Sunday, September 16, 2012

Best Mug, Cups, and Water Bottle for Techies

Here are the four liquid receptacles that support my freelance web developer career. They're listed in order of usage.

(I need to build a special rack for these guys)

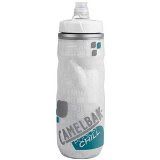
For water, I take my Camelbak Podium Chill Water Bottle everywhere. Home, co-working space, working out, trips. Tip of the hat to Donn Felker for doing the leg work on finding this excellent bottle. My only complaint is that it "talks" sometimes. If pressure builds up it will start making noise when it leaks out until you give it a little squeeze.


For coffee this Nissan Leak-Proof Travel Mug has been my goto for about 8 years. I own 3 of them and have bought at least 3 more as gifts. When closed this thing seals like no other. As good for road trips as it is for working around your laptop.


If you don't like the bulky handle, this other Travel Mug from Thermos Nissan is a great alternative recommended by my wife.


For tea, I have my third Thermos Nissan pick, a Tumbler with Infuser. I'm just getting into tea so there are probably some other great options I haven't discovered yet, but I've been really happy with this unit so far.


This summer I got addicted to Starbucks' iced coffee with a shot of white moca. Instead of paying $4 each day I decided to try make my own. First I tracked down the white mocha Starbucks uses. Next, since I use a Keurig for speed and convenience, I went with these Iced Coffee K-Cups. To complete the experience, my wife found these 16oz re-usable Starbucks cups with re-usable straws. To make the drink, put a couple of pumps of white chocolate in first, then fill to pretty much the top with ice, set the Keurig to the 8 oz setting, and brew directly onto the ice. The Iced K-Cups are specially formulated to brew stronger then regular K-Cups, so when the ice melts it balances out. Stir it up to blend in the white chocolate. Then I usually add a few more ice cubes if there is space.


Tuesday, August 28, 2012

Force Content Types to Json in .NET WebApi

I ran into a situation where I couldn't set the Content-Type header in the http request client I was using. (Crossrider's appAPI.request.post)

The client was either not setting a Content-Type or defaulting to application/x-www-form-urlencoded

If you put the code below in Application_Start you should be able to force form-urlencoded data to the JsonFormatter and by removing the XmlFormatter, Json will also be the default.

HttpConfiguration config = GlobalConfiguration.Configuration;
foreach (var mediaType in config.Formatters.FormUrlEncodedFormatter.SupportedMediaTypes)
{
    config.Formatters.JsonFormatter.SupportedMediaTypes.Add(mediaType);
}
config.Formatters.Remove(config.Formatters.FormUrlEncodedFormatter);
config.Formatters.Remove(config.Formatters.XmlFormatter);

Saturday, August 18, 2012

Using Less and Twitter Bootstrap in ASP.NET MVC4

UPDATE 05/02/2013:

Changed ScriptBundle and StyleBundle to just Bundle, per Andrey Taritsyn:
Bundle Transformer it is not recommended to use together with the StyleBundle and ScriptBundle classes, because these classes already contain transformations (instances of the built-in minifiers: CssMinify and JsMinify). Use a Bundle class.

UPDATE 11/08/2012:
  1. Create a new MVC4 Internet Application
  2. Add the following Nuget Packages
  3. Rename /Content/site.css to /Content/site.less 
    • Edit BundleConfig.cs in the App_Start folder and update the css file name to site.less like so:
      bundles.Add(new var cssTransformer = new CssTransformer();
      var jsTransformer = new JsTransformer();
      var nullOrderer = new NullOrderer();
      
      var defaultScriptsBundle = new Bundle("~/bundles/default.js").Include(
                  "~/Scripts/jquery-{version}.js",
                   "~/Scripts/jquery-ui-{version}.js",
                  "~/Scripts/site.js");
      defaultScriptsBundle.Transforms.Add(jsTransformer);
      defaultScriptsBundle.Orderer = nullOrderer;
      bundles.Add(defaultScriptsBundle);
      
      var defaultStylesBundle = new Bundle("~/Content/default.css").Include("~/Content/site.less");
      defaultStylesBundle.Transforms.Add(cssTransformer);
      defaultStylesBundle.Orderer = nullOrderer;
      bundles.Add(defaultStylesBundle);
      
    • Add the following to the top of /Content/site.less in order to have access to all of the Bootstrap mixins:
      @import "less/bootstrap.less"; 
      body {
            padding-top: 60px;
            padding-bottom: 40px;
      }
      @import "less/responsive.less"; 
      

    =================== THE REST OF THIS POST IS OUT OF DATE ==========

    UPDATE 8/20/2012: I've created a Nuget package that performs the steps below. I'd suggest reviewing what the package does below and then running:
    Install-Package Twitter.Bootstrap.Less.MVC4

    ASP.NET MVC4 has a great new feature that can bundle and minify your CSS and Javascript files.

    But in order to get Twitter Bootstrap to work it takes a bit more work. Here are the steps that worked for me.

    1. Create a new MVC4 Internet Application
    2. Add the following Nuget Packages
    3. Create an Infrastructure folder and add the following two files: (hat tip to this Stackoverflow question)
    4. Rename /Content/site.css to /Content/site.less 
    5. Edit BundleConfig.cs in the App_Start folder and replace the default Content/css bundle with the following:
      var css = new Bundle("~/Content/css").Include("~/Content/site.less");
      css.Transforms.Add(new LessMinify());
      bundles.Add(css);
      

    6. Add the following to the top of /Content/site.less in order to have access to all of the Bootstrap mixins:
      @import "less/bootstrap.less";
      

    If you have "shared" .less files from other projects I found importing them in site.less right after boostrap.less to work pretty well. They'll have access to all the mixins.
    @import "less/bootstrap.less";
    @import "less/shared.less";
    

    The completed solution is available on Github here

    If there is a better/easier way to do this please let me know in the comments!


    Friday, August 3, 2012

    Passing Cookies to a Node.js REST Client

    In Node.js if you want to pass the current user's Cookies to a REST call your making from the server here's a simple way to do it:

    var cookies = _.map(req.cookies, function(val, key) {
        return key + "=" + encodeURIComponent(val);
    }).join("; ");
    
    rest.get("http://makerocketgonow.com/", {
        headers: {
            Cookie: cookies,
            "Content-Type": "application/json"
        }
      }).on("complete", function(data) {
        return console.log(data);
    });
    

    This example uses the popular Restler library, but I assume you could do something similar with other libraries or without using a library.

    CAUTION: I'm using encodeURIComponent on the cookie value. Ruby on Rails seems to expect their cookies to be encoded like this. On the other hand, I've looked throw a few Node.js libraries that deal with cookies and they don't seem to manipulate the value at all. So you can play with adding or removing encodeURIComponent.

    If you start to get errors when making the REST request, be sure to check the cookie encoding/format versus what Firebug sends on a normal request to the site. Pay particular attention to any special characters.

    Monday, July 16, 2012

    Using Mongoid 3 (MongoHQ or MongoLab) on Heroku

    Here's what you need to get Mongoid working on Heroku, if you're getting errors like:
    NoMethodError (undefined method `[]' for nil:NilClass)

    Make sure the following is in your gem file (reference).
    source 'http://rubygems.org' 
    ruby '1.9.3'
    gem  'rails', '3.2.3'

    If you get an error like undefined method `ruby' run the following:
    gem install bundler --pre

    A lot of places have outdate documentation for configuring your mongoid.yml file which may result in the following error:
    No database provided for session configuration: :default

    Your mongoid.yml file should look like the following.
    production:
      sessions:
        default:
          uri: <%= ENV['MONGOHQ_URL'] %>
          options:
            skip_version_check: true
            safe: true
    The ENV variable above is for MongoHQ. For MongoLab use ENV['MONGOLAB_URI'] 


    Big thanks to the guys in this StackOverflow thread for helping me put all this together!